
1. Preparation of the support base :
The support must be solid, healthy, leveled, clean and dust-free.
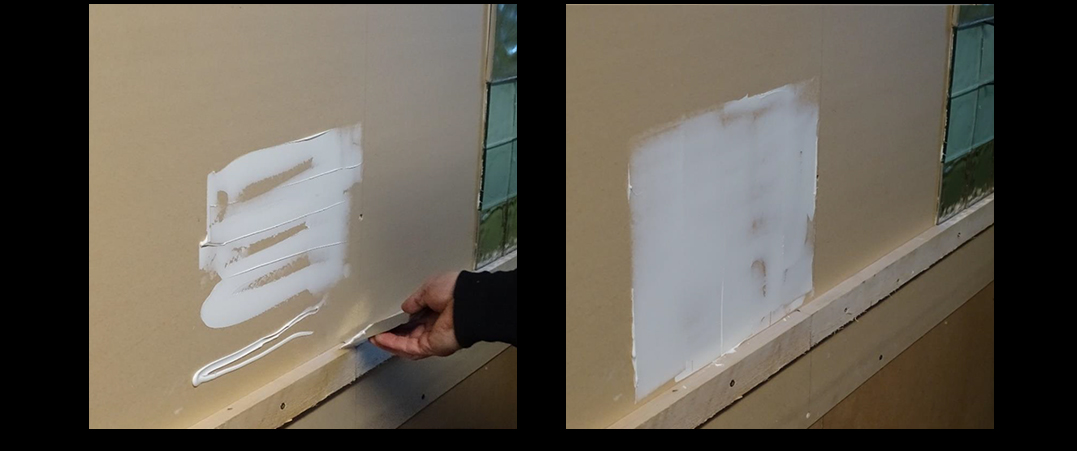
Place a base strip at a tile height from the ground.
Apply a thin layer of silicone glue.
Spread using a metal spatula to distribute the glue evenly.
Check that the glue adheres well to the support.
Tip: Proceed in sections the size of a few tiles.
2. Preparation of the tiles :
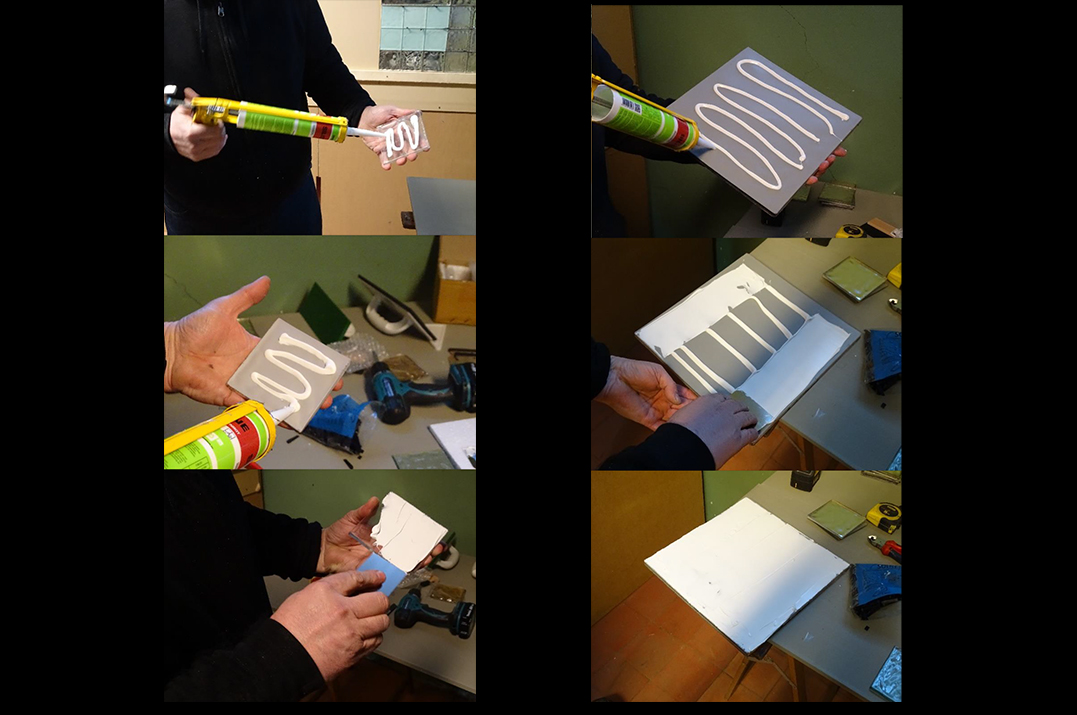
Dust each tile.
Apply a thin layer of silicone glue to the back of the tile.
Spread using a metal spatula (smaller than the width of a tile for ease).
Distribute evenly over the entire back surface of the tile.
Tip: Do not let the silicone glue overflow onto the edges of the tile.
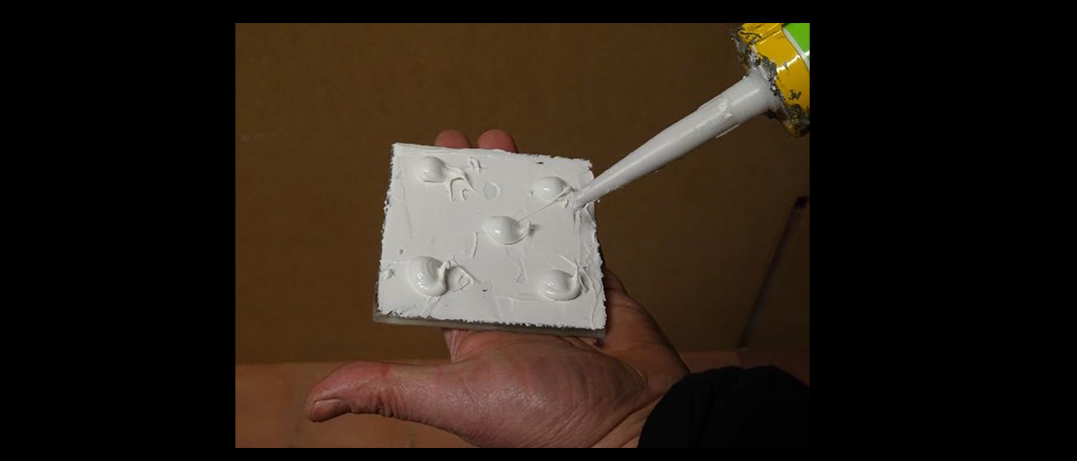
Place a few dabs of silicone glue, taking care not to position them too close to the edge.
– 1 central dab for 5cm x 5 cm tiles
– 5 dabs (4 dabs near the corners and one central) for 10 cm x 10 cm tiles
– 9 to 12 dabs for 30 cm x 30 cm tiles
Adjust according to tile thickness and weight.
3. Laying the tile :
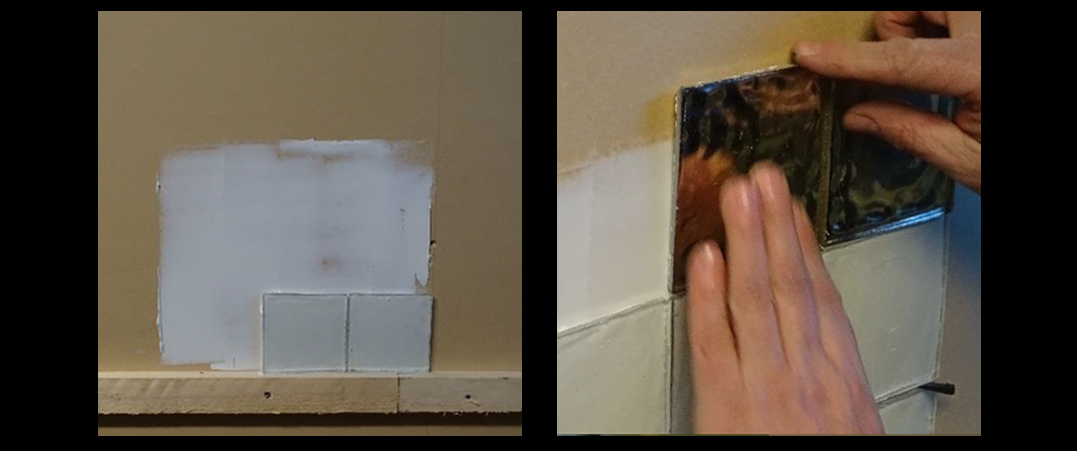
Place the pre-pasted tile on the previously coated support.
Press lightly so that the tile remains on the support.
Make sure that the glue does not overflow onto the side of the tile or into the joints.
If necessary, remove the excess that overflows using a spatula.
Use leveling blocks.
Do not completely crush the dabs against the wall, you must leave a space between each dab.
Caution: do not overlap too many tiles (40-60cm?).
The weight of the tiles could cause the tiles underneath to become loose.
Wait until the glue on the first levels has set.
4. Leveling wedges :
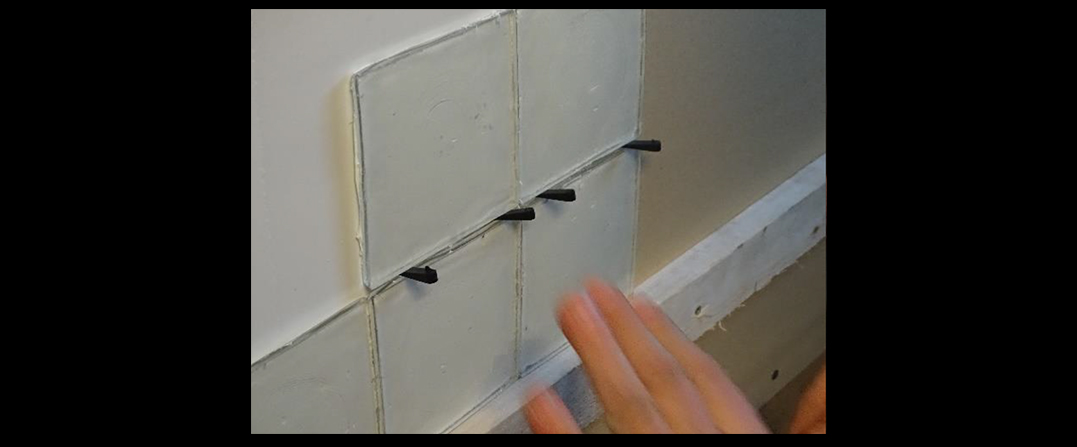
Position leveling blocks between the different tiles.
IMPORTANT !!! : the joints must be AS THIN AS POSSIBLE:
approximately 1mm (2mm maximum) for an aesthetic result.
Wedges are essential so that the tiles do not slide and do not touch the tiles below.
Note: Commercially available plastic spacers create joints that are too large.
SHINY glass tiles :
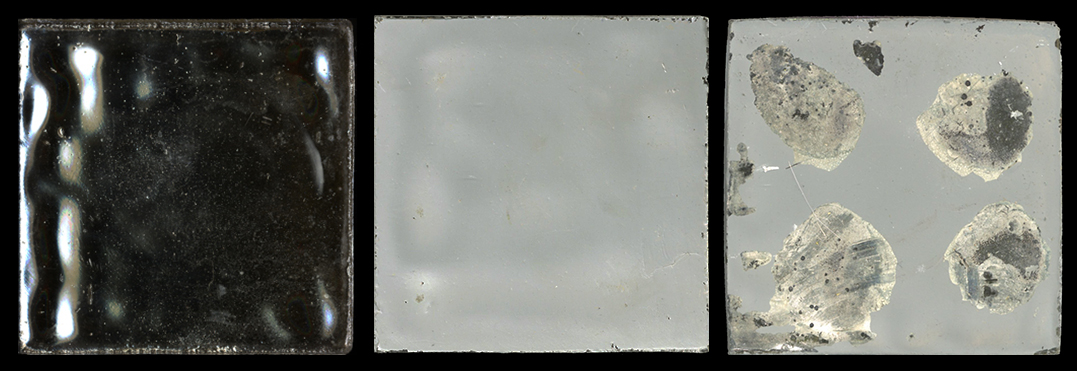
SHINY (mirroring) glass tiles are covered on the back with a thin film of reflective metal
and then coated with a protective layer.
Retraction of usual installation products can cause partial or total tearing of the protective layer
and reflective film, and even detachment of the tile.
The same effect can occur for SHINY tiles when the installation products contain components which react with the protective layer and weaken it.
Therefore, we recommend the use of a very flexible neutral silicone glue or sealant for coating and bonding our glass tiles.
But you should always test this putty or glue on the protective layer for SHINY tiles to check if they are compatible.
We have tested and sell the neutral white silicone sealant “OMNIKIT” which is suitable for installing our glass tiles
provided you perfectly follow the installation description in images above.
Transparent tiles (coloured or not) :
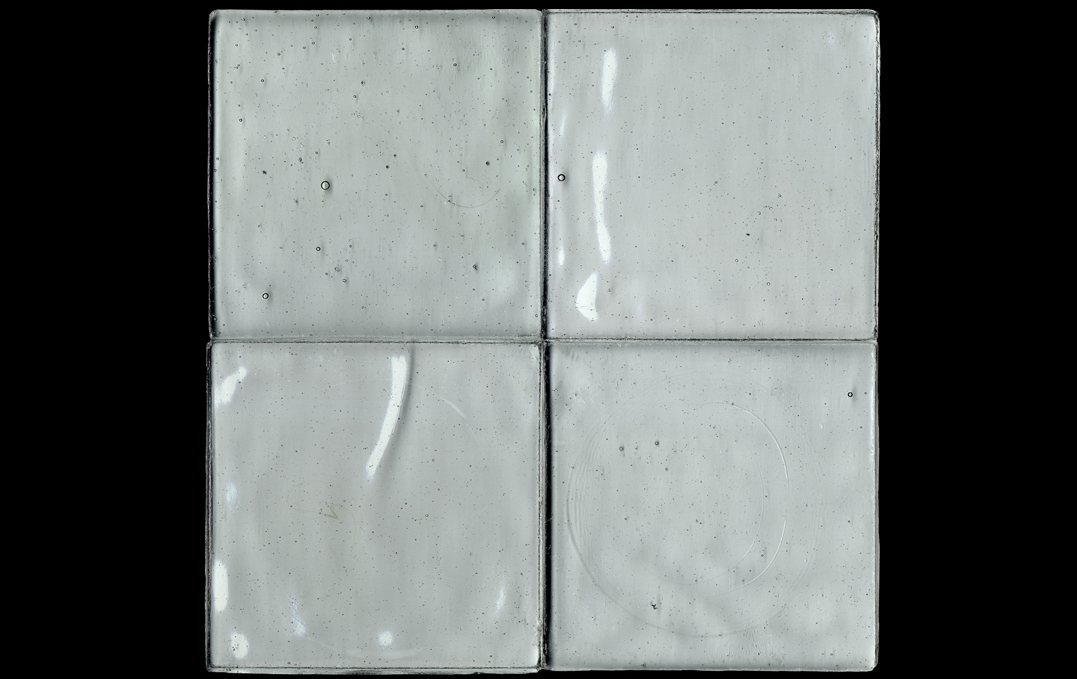
For transparent tiles, the putty must be white in color to take advantage of the fact that the tile is transparent
and colored (or not) in the mass,
revealing bubbles and imperfections that make up the charm of artisanal production.